Code snippets (or code templates) are an incredibly useful feature. They allow inserting and editing template blocks of code, which is useful for quickly replicating common patterns, or learning new patterns. This post explains how to use snippets, and a future post will explain how to create snippets.
Inserting Snippets
There are three ways to use snippets: the Insert Template command, Tab expansion, and the Toolbox.
Insert Template Command
The Insert Template… command can be activated from the Edit->Insert Template… menu, or the Control-T keybinding on Windows and Linux. It shows a list of all templates valid for the current file type, and you can match them using the same substring matching as the completion list. Select one and hit Enter to activate it.

If there is a selection, then this command will turn into the Surround With… command. This only shows templates that have the “Surround With” flag. They will take the current selection and incorporate it into the template. For example, the “for” template will put the selection into the loop body.
Tab Expansion
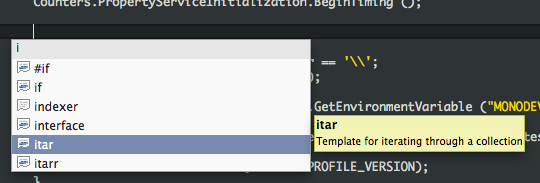
If the snippet has a shortcut, type the shortcut and then hit Tab. The shortcut will be in the completion list, so if you pick the item from the completion list you must hit tab twice, once to commit the selection, and once to expand it. The second tab is necessary because snippets may have the same name as keywords or symbols, and if they activated as soon as they were committed, you would not be able to type the keyword or symbols. Indeed, there are built-in snippets for many C# keywords.
The Toolbox
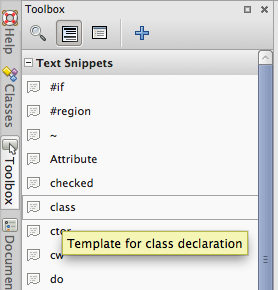
When the text editor is focused, the Toolbox Pad shows all of the snippets valid for the current document. Drag one to the text editor to insert it at a specific position, or double-click it to insert it at the caret position.

Using Snippets
When a snippet is inserted, it may simply insert plain text and move the caret to a location somewhere within it. However, advanced snippets will have linked regions to enable you to customize the usage of the snippet. For example, the C# “for” snippet contains two editable regions, with other regions linked to them.

When the template is activated, the region with the declaration of the loop variable “i” is selected. You may type a new name, and both other uses of that name will be updated. Then, hit Tab to move to the next editable region. You can now change the value of the upper limit of the loop. Tab and Shift-Tab can be used to cycles between the editable regions, and when you are done, hit Enter or Escape to exit region editing mode and move the caret to the loop body.
